Our Location
5th Floor, Huake Center, Lanshan District, Linyi City, Shandong Province, China

5th Floor, Huake Center, Lanshan District, Linyi City, Shandong Province, China
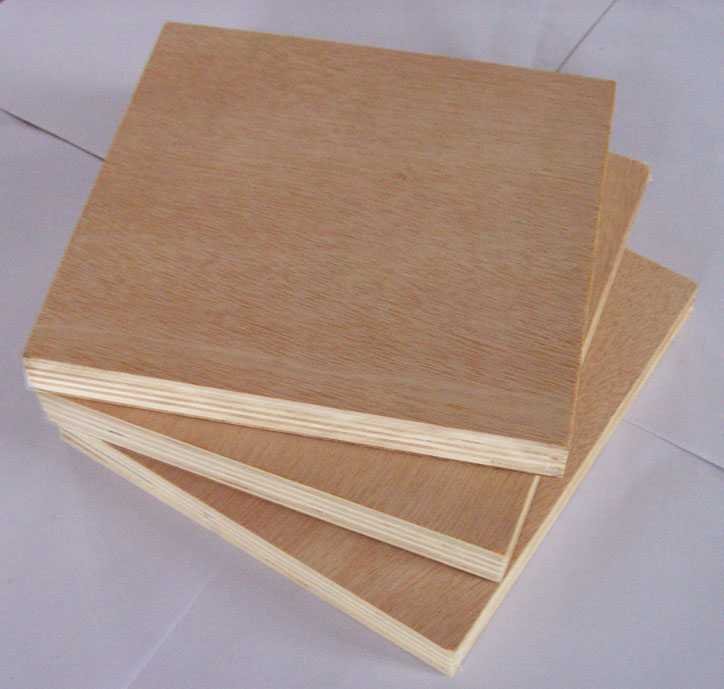
The glue only holds what the clamp closes, and a plywood c clamp carries the panel joint through the cure with the reach and the pressure that the sheet needs. The C frame gives the deep throat a panel edge requires, so the pressure lands on the joint instead of the far side of the sheet. This guide covers choosing the clamp, setting the pressure, spacing the row, and protecting the plywood face under the pads.
The C shape opens one side so the jaw reaches deep across the panel, and the frame stays rigid while the screw drives the pressure home. For a plywood glue-up, that reach means the force sits at the seam where the glue line closes. The frame survives the shop, and the screw gives the fine control the joint needs.
The throat depth decides how far from the edge the clamp can grip, so a deeper throat closes a joint that sits back from the panel edge. Measure the distance from the seam to the frame and buy the throat that clears it. A throat too shallow forces the clamp onto the wrong line of the joint.
A cast frame takes the pressure of a long glue-up without the flex that starves the seam. The stiff frame keeps the jaw parallel as the screw tightens, so both pads close evenly on the panel. A frame that bends under load drops the pressure from one side of the joint.
The size of the clamp follows the panel: small clamps for the edge banding and the box joints, larger frames for the full sheet glue-up. Match the capacity to the thickest stack the job builds, because a clamp that runs out of thread stops short of the pressure. Buy the set that covers the panel widths in the shop.
Check the maximum opening against the panel stack, keeping enough thread engagement for the screw to bite when the jaws close. A clamp at the end of its travel cannot add pressure to the joint. Leave travel in reserve for the pads and the shims of the glue-up.
The handle sets how finely the pressure comes on: a sliding bar drives fast, while a wooden or T-handle gives the feel that stops the over-tightening. The control matters on plywood, where the pad can crush the veneer before the joint closes. Choose the handle that lets you stop at the squeeze-out.
The joint needs enough pressure to close the glue line and starve nothing, and the plywood face needs enough mercy to avoid the dent. The squeeze-out tells the story: a thin, even bead means the pressure is right across the seam. Tighten to the bead and stop before the pad leaves its mark.
A continuous thin line of glue along the whole joint shows even pressure; dry spots show where the clamp runs out and wet patches show where it runs heavy. Adjust the row until the bead reads even end to end. The bead is the gauge the joint gives you before the glue sets.
Cap the pads with a scrap of thin ply or a soft block so the steel never meets the veneer directly, and the pressure spreads instead of concentrating. The soft pad protects the face and widens the contact area on the sheet. Change the pad when it hardens with the dried glue.
A row of clamps works as a team, so the spacing between them decides whether the seam closes everywhere or only where the steel lands. Set the clamps close enough that the panels touch between them without the gap. The pattern follows the joint length rather than a fixed count.
Space the clamps so the pressure zones overlap along the seam, alternating from each side of the panel to keep the force balanced. Clamps set only on one side pull the panel out of flat as the glue cures. Alternate the sides and the panel stays true.
Start the row from alternating edges so the screw pressure does not tilt the sheet into a bow. The balanced row keeps the panel flat while the glue develops its full strength. Check the flatness across the panel before the glue grabs.
Beyond the flat glue-up, the C clamp holds the edge joint, the frame corner, and the laminated block while the glue sets. The reach closes the butt joint and the face frame without the wobble of a spring clamp. Each joint type takes its own pad placement.
Edge-to-edge panels take the clamps across the seam with the pads bridging both sheets, and the laminated blocks take the full row for the even spread. The pad sits over the joint line so the pressure closes the glue rather than sliding the sheets apart. Keep the pads aligned with the seam.
The frame corner takes the clamp across the diagonal so the joint draws tight while the glue develops, and a square check keeps the frame true. The C clamp reaches where the corner needs the force without the frame twisting. Check the diagonal and release only after the glue grabs, because the joint holds its square only when the frame cures in the right shape. Keep a spare clamp in the row so a low spot on the seam gets a second pressure point while the glue is still open.
The panel work fails in a few familiar ways: the dent from a bare pad, the starved joint from too little travel, and the bow from a one-sided row. Each mistake comes from the clamp setup rather than the glue. Set the pads, the travel, and the row before the clock starts on the glue.
A bare steel pad on the soft veneer leaves a ring that the finish cannot hide, so cap every pad and spread the contact. The dent appears minutes after the pressure lands and stays for the life of the panel. The soft pad costs nothing and saves the face.
A clamp that runs out of travel closes the near edge and leaves the far side of the seam open, starving the glue line. Swap for a deeper capacity or a stack shim that gives the screw room to bite. The joint that closes evenly holds the load the panel was built for.
These are the questions builders ask most with a plywood c clamp.
Yes, the deep throat reaches across the panel to close the joint, which is exactly what a glue-up needs. Pad the jaw so the steel does not dent the veneer.
Tighten until a thin, even bead of glue squeezes out along the joint, then stop. More pressure risks crushing the face without improving the bond.
Space them so the pressure zones overlap along the seam, alternating from each side of the panel. The gap closes everywhere rather than only under the jaws.
The capacity must clear the panel stack with screw travel left over, and the throat must reach the joint from the frame. Measure the seam distance before buying.
A bare pad can dent the soft veneer under high pressure, so cap every jaw with a scrap block. The soft pad spreads the force and keeps the face clean.
Set the throat depth, pad the jaws, and space the row so the seam closes even end to end, and the glue takes the load from a joint that stays closed. The C clamp carries the panel through the cure without the dent or the bow. When the build needs panels that glue and clamp cleanly across the sheet, HYY supplies straight, flat panels with the face and thickness marked, and the Fancy Plywood and Commercial Plywood pages show the sheets that take the clamp row. The complete plywood product range backs the glue-up before the first clamp lands.