Our Location
5th Floor, Huake Center, Lanshan District, Linyi City, Shandong Province, China

5th Floor, Huake Center, Lanshan District, Linyi City, Shandong Province, China
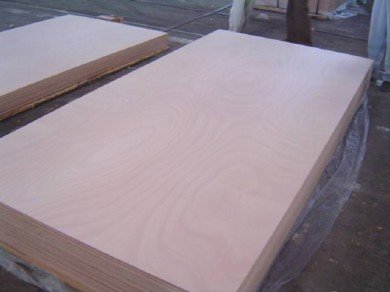
A plywood aquarium turns a sheet of panel into a tank that holds water for years, once the builder seals the wood the right way. The panel gives the flat, workable walls that a large DIY tank needs at a fraction of the glass cost. This guide covers the panel choice, the sealing system, the bracing, and the leak test that decides whether the plywood aquarium earns its water.
Glass tanks get expensive and fragile above the smaller sizes, while a plywood box scales to a bigger volume with the tools already in the shop. The panel cuts, glues, and seals into a custom tank that fits the stand and the room. The water pressure stays inside because the sealing system does the real work.
The sheet size sets the tank dimensions, so the build can match the stand, the alcove, or the room that a stock glass tank never fits. A large plywood aquarium lands as a weekend build rather than a delivery of fragile glass. The custom box takes the exact footprint the room allows.
One sheet plus the sealing system costs less than the glass equivalent of the same volume, which is why builders choose the panel for the big tanks. The saving sits in the material rather than the labour, because the sealing coats take time. Read the build as a trade of the glass price for the shop hours.
The aquarium panel must take water on every face, so the bond and the core matter more than the appearance grade. A fully waterproof bonded panel with a void-free core keeps the water out of the wood for the life of the tank. The face grade stays secondary once the sealing coats cover the panel.
Exterior or marine bonded panels carry the waterproof glue line that a tank demands, and the void-free core stops the water from creeping into the hidden gaps of the layup. Interior grades swell at the glue line under continuous water and fail the tank early. The bond rating decides the panel before the face letter.
The wall thickness follows the tank height, because the water pressure grows with the depth of the panel. Taller tanks take the thicker panel or an external frame that carries the load the wall cannot. Set the thickness from the height and the span of each wall before the sheet is cut.
The seal is the tank: the panel gets the epoxy or the fibreglass lining that turns the wood surface into the barrier the water meets. Every face, edge, and joint takes the coating in the system the builder follows, with cure time between the layers. The seal carries the whole promise of the plywood aquarium.
The tank interior takes flood coats of epoxy resin or a fibreglass cloth layup that bridges the joints and closes the panel face. The coating wets the wood and builds the film that the water sits against. Follow the recoat window of the resin, because a coat applied outside the window never bonds to the layer below.
The cut edges drink water first, so every edge gets the primer and the coat before the assembly closes them in. The corner joints take the reinforcement that stops the seam from weeping under the pressure. Seal the panel parts before the box goes together and the water never finds the core.
A water-filled box pushes hard on its walls, so the frame and the bracing carry the load that the panel alone cannot. Cleats along the top and bottom rails, and braces across the span, keep the walls from bowing into the room. The structure holds the panel flat while the tank sits full.
The top rail stiffens the wall against the outward push and carries the lid, while the bottom cleat ties the walls into the base of the tank. Both members turn the flat panel into a box that holds its shape under the load. Fix them into the framing lines so the screws bite the solid wood.
Long tanks take a centre brace or an under-brace across the span so the wall never reads as a sail under the water. The brace shortens the span and holds the panel flat across the full width. Design the brace into the build rather than adding it after the first bow.
The finished tank earns its water through the fill test: fill it with plain water, watch every joint, and let it sit before the livestock arrives. The test finds the weeping seam while the fix is still a coat away from the cure. No tank starts a display before it passes the test.
Fill the tank slowly and mark the water line, then watch the joints and the edges for the first beads of moisture over the hours. A weeping corner shows where the reinforcement needs another pass. Keep the test water plain so the sealant cure stays clean.
Drain, dry, and cure the sealed tank for the period the resin instructions call for before any water and livestock share the box. The cure drives off the solvents that would otherwise cloud the water and stress the fish. Stock only after the seal reads cured and the second test runs clear.
The tank that lasts keeps the water inside and the seal intact through the seasons, which comes down to the build details the first time. The usual failures are a panel under-rated for the height, a coat skipped at the edge, and the stock added before the cure. Each one shows up as a leak or a cloudy tank.
A seam that weeps under load needs the joint opened back to sound sealant and rebuilt with the reinforcement over it. Patch the seam while the tank is dry and let the new coat cure fully before the next fill. The rebuilt joint holds the pressure the first coat could not.
Avoid the hard scrapes on the panel floor during the cleaning, because a cut through the coating lets the water reach the wood. Touch up the damage the day it appears rather than waiting for the next maintenance window. The intact seal is the whole maintenance plan of the tank.
These are the questions builders ask most with a plywood aquarium.
Yes, a bonded plywood panel sealed with epoxy or fibreglass holds water as a DIY tank, and the build scales to sizes glass does not reach affordably. The sealing system carries the promise.
A fully waterproof bonded panel with a void-free core, sealed on every face and edge, suits the tank. Interior grades swell under continuous water and fail early.
Flood coats of epoxy resin or a fibreglass layup close the panel and the joints, with the recoat window respected between layers. Cure the tank fully before it holds water and livestock.
A fully cured, sealed tank is safe once the resin has finished curing and the test water runs clear. Cure and test before stocking, and keep the coating intact during cleaning.
With the right panel, a complete seal, and the brace designed in, a plywood tank holds water for years of service. The seal maintenance decides the life more than the wood itself.
Choose the bonded panel, seal every edge before the assembly, brace the long walls, and pass the fill test before the livestock arrives. The panel gives the size and the seal gives the tank. When the build needs a waterproof bonded panel cut for the walls, HYY supplies exterior bonded panels with the bond and thickness marked on the sheet, and the Commercial Plywood and Film Faced Plywood pages show the working panels for the sealed build. The complete plywood product range backs the tank before the first fill.