Our Location
5th Floor, Huake Center, Lanshan District, Linyi City, Shandong Province, China

5th Floor, Huake Center, Lanshan District, Linyi City, Shandong Province, China
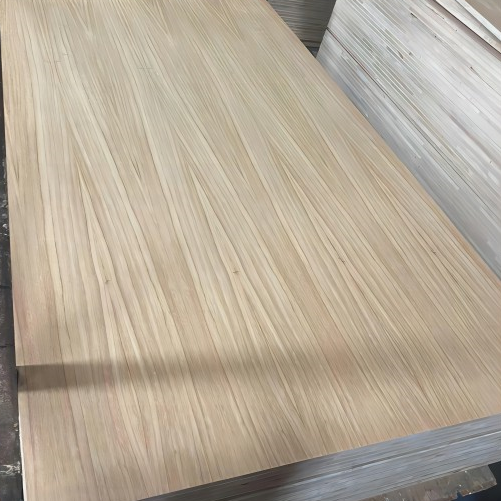
Most buyers never stop to ask how is plywood made, yet the process explains every quality difference between a cheap sheet and a durable panel. Plywood starts as a round timber log and ends as a flat, cross-laminated board whose layers resist splitting and warping. This guide walks through the full manufacturing line so the next sheet you order makes sense at every layer.
The mill starts with logs chosen for a straight, defect-free core, because the log diameter determines the panel size. Softwood and hardwood species both become plywood, and the species sets the strength, weight, and price of the finished sheet. Logs arrive sorted, debarked, and cut to length before they enter the peeling line.
The mill heats or soaks the debarked logs so the wood softens and peels cleanly around the spindle. Steam conditioning brings the moisture and temperature to a range where the veneer cuts without tearing. A log peeled too cold produces rough veneer, and a log peeled too hot loses strength at the fibre level.
Hardwood veneers like birch and beech offer stiff, fine-grained faces for furniture and cabinetry, while softwood fir and pine give structural strength at a lower price. The species also affects the bond, the paint hold, and the density of the finished board. Manufacturers blend species by layer when the spec demands both strength and a clean face.
Rotary peeling spins the debarked log against a long knife, unwinding it like a roll of paper into a continuous veneer ribbon. The mill slices the ribbon to width, then clips it into individual sheets that dry and grade. The knife angle and the feed speed set the veneer thickness, which typically ranges from 0.4 to 4 mm per layer.
A sheet of plywood is built from an odd number of veneer layers, usually three, five, or more, so the grain runs perpendicular across each successive layer. Cross-lamination spreads the load and cancels the natural tendency of wood to split and warp in one direction. More layers at a set thickness mean thinner veneers and a more stable board.
Operators clip the continuous ribbon into veneer sheets at defects and moisture breaks, then sort them by grade. Wideness and surface quality route each sheet to the right layer of the final panel, with the cleanest veneers reserved for the faces. The sorting step decides both the grade letter and the price of the finished sheet.
Green veneer holds too much moisture to glue, so the sheets pass through a dryer that lowers the moisture content to a level where the resin cures properly. Under-dried veneer leaves weak bonds and steam pockets, while over-dried veneer becomes brittle and rejects glue. The dryer sets the moisture window that the whole panel depends on.
Prepared veneers pass through glue spreaders that coat both faces with a uniform resin film. The adhesive type decides the panel’s exposure rating: interior and moisture-resistant glues suit dry indoor use, while exterior and structural bonds hold against weather and load. The glue line is as important as the wood, because it holds every layer together.
Poorly spread resin, contaminated veneer, or excess moisture at the bond line produces voids, hollow spots, and delamination in service. A manufacturer that skips cleaning or starves the glue saves cost at the press and sells a weaker board. The adhesive formulation and the spread rate show up in the warranty more than in the catalog photo.
The stacked veneers, with alternating grain direction, enter a hot platen press that cures the resin and fuses the layers into one solid board. Heat and pressure close air pockets, flatten the stack, and bond every veneer seam. The press cycle time and temperature follow the adhesive specification exactly.
Pressing under controlled pressure compresses the stack to a uniform thickness and squeezes out excess glue near the edges. A panel that leaves the press out of tolerance will not machine cleanly on the finishing line. The platen temperature and the cure time together set the board’s hardness, stability, and water resistance.
After pressing, the line trims the board square, sands it to a uniform thickness, and patches and fills it for a higher face grade. Trimming removes the cured glue squeeze-out at the edges, and sanding brings the faces parallel. The panel then moves to grading, testing, and packing.
The mill grades finished panels on both faces, tests them for bond and structural performance, and marks them with the stamp before shipping. Face grades run from the smooth, defect-free A face down through B, C, and D, with letters describing patches, knots, and repair quality. The stamp states the grade, the bond class, and the performance standard on every full sheet.
Sample panels are cut into coupons and tested for glue bond, bending strength, and moisture stability to confirm the batch meets its rating. The test results support the certification mark that specifiers look for. A panel without a stamp or test documentation carries no proven capability, whatever its price.
Graded panels stack in packs with edge protection and wrap against moisture for the journey to port and distributor. Packing decisions affect the delivered quality, because water and heavy handling damage unprotected faces. The pack label repeats the grade and the batch, so the buyer can verify the delivery against the order.
The mill controls moisture at every stage because moisture drives the weak points that appear long after the panel ships. Delivered panels arrive sealed to hold the factory moisture, and the buyer controls stability from the moment the wrap opens. Flat, dry storage keeps the flatness the press created, so the manufacturing effort pays off on site.
The press cures the resin around the target moisture, so a panel that dries too far or absorbs damp afterwards works against its own bond. A wet edge swells and rejects finishes, while an over-dry board shrinks and cracks at the face. Match the storage to the delivery moisture and the panel behaves exactly as the mill intended.
Keep the pack wrapped, raised off the ground, and covered from rain until the installer needs each sheet. Protect the cut edges once the pack opens by sealing or painting them before service. The care at the building site decides more of the final quality than the last press setting.
Confirm the grade, bond, and thickness on the delivered sheets match the order before the stack is accepted. Sight one sheet for flatness and check the edge for a clean core with no open voids. A quick delivery inspection catches a manufacturing issue at the door instead of in the wall.
The process adapts to the end use, and each plywood type changes a stage along the line. A film faced panel adds a phenolic resin overlay before pressing for concrete formwork and wet service. A melamine faced panel bonds a decorative layer for furniture and cabinets, and a structural softwood panel uses commodity veneers for framing and sheathing at the best price.
Interior plywood uses moisture-resistant glue for dry rooms, while exterior panels cure with a fully weatherproof bond rated for outdoor exposure. The veneer quality also differs, because exterior faces must survive weather without warping the face. Choose the bond for the service, and the price follows the rating.
Decorative panels add a fine wood or coated surface at the face stage, then press the overlay into the core as one board. The added face raises the price but removes finishing work in the workshop. For visible furniture, the decorative face beats a sanded raw veneer that needs its own final coats.
| Plywood type | Process difference | Typical use |
|---|---|---|
| Structural | Commodity veneers, exterior bond | Framing and sheathing |
| Film faced | Phenolic overlay before pressing | Concrete formwork |
| Melamine | Decorative layer bonded on face | Furniture and cabinets |
| Marine | Exterior bond, void-free core | Boat and wet service |
| Hardwood face | Fine veneer on the faces | Visible joinery and panels |
The table summarises how manufacturers adapt one production line to five very different panels. The face and the bond change, while the core manufacturing stages stay almost identical.
The manufacturing story converts into ordering rules. Buy the bond class for the exposure, confirm the face grade you actually need, and read the mill stamp before release. Premium faces pay only where the surface shows, and structural capacity comes from the core and the glue, not from the appearance of the outer veneer.
Ask the supplier how the panel is pressed and what bond it carries, and check a delivered sheet against the stamp. A flat, square, well-bonded panel proves the mill kept every stage honest. When a project needs consistent engineered panels, HYY supplies factory-pressed boards in the grades and bond classes the build calls for, and the Commercial Plywood and Film Faced Plywood pages show panels with their performance clearly stated. Browse the complete plywood product range before you name the grade on the order.