Our Location
5th Floor, Huake Center, Lanshan District, Linyi City, Shandong Province, China

5th Floor, Huake Center, Lanshan District, Linyi City, Shandong Province, China
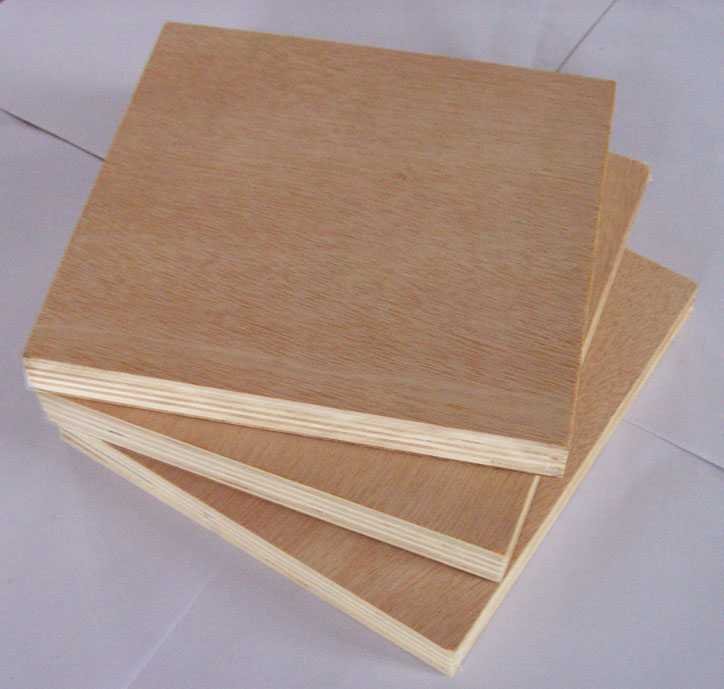
One sheet of plywood turns into the seat that survives the patio winter or the top that takes the whole workshop, and a plywood bench proves the panel strength in daily use. The build reads simple until the sag, the wobble, and the wet face show up in the first season. This guide covers the panel choice, the workbench and garden designs, the joinery, and the finish for a bench that carries the load.
A bench lives on its span, so the plywood thickness decides whether the top stays flat and the seat holds two adults. An 18 mm sheet covers a normal bench span with a stiff, quiet surface, while a stacked or laminated panel carries the workshop loads that a single sheet cannot. Set the thickness by the span and the weight first.
A single 18 mm sheet suits the garden bench and the light workbench, and a laminated stack of two sheets carries the heavy shop top. The laminated panel acts like a slab, resisting the twist and the long-span sag that a single sheet takes. Build the lamination with glue and clamps while the panel sits flat on the frame.
Keep the span between the legs short enough that the panel never reads as a spring under the load. A long unsupported span on a thin sheet cups and bounces, and no finish fixes the flex. Set the legs to the span, or thicken the panel until the span holds.
The two common plywood benches pull in different directions: the workbench needs a dead-flat top and a stiff base, while the garden bench needs a shaped seat and a weather-ready face. Each design starts from the same panel and takes its own framing. Pick the design before the cut list.
A workbench builds from a laminated plywood top on a braced frame, with a face apron and legs that hold the top flat under the mallet. Add a hardboard or ply back panel to lock the base square against the racking of the planing stroke. The bench reads flat because the frame keeps it flat.
The garden bench takes a shaped plywood seat with the curve cut from the sheet, and a slatted or solid back that carries the sitter comfortably. Cut the seat profile from the full panel so the grain runs the length of the span. The shaped panel dresses the garden the same way a deck dresses the yard.
Everything starts at the layout: mark the top, the legs, the aprons, and the seat profile on the sheet, and take the parts in the order the saw reads clean. Cut slightly oversize and trim the parts to the final line after the primary cuts. The laminated top gets its flatness on the bench before any part is assembled.
Spread the glue evenly across the mating faces, stack the sheets, and clamp across the panel until the squeeze-out runs the full seam. Keep the stack flat on the bench so the lamination cures without the built-in bow. Trim the edges square after the glue develops.
Transfer the seat curve to the panel and cut it with the jigsaw, then sand the edge to the line with the block. A clean curve lets the seat take the body without the pressure point on the cut edge. Test the curve against the frame before the finish goes on.
The bench frame holds through the joints: screws into the leg with glue, and a stretcher that ties the legs across the span. Pocket holes carry the apron into the leg cleanly, and the stretcher keeps the legs from spreading under the load. The frame assembles square on the flat bench.
Screw and glue the aprons into the legs, then set the lower stretcher so the frame resists the twist of a loaded top. Check the diagonals while the glue is open, because a racked frame telegraphs into a wobbling seat. The square frame carries the panel flat for the years.
Fix the top to the frame with screws driven from underneath, or use slotted holes that let the panel move with the season. The underside fix leaves the bench face clean, and the slots stop the panel from splitting at the fastener line. Set every screw flush and the top stays quiet under the hand.
The bench finish sets its life: an exterior oil or varnish for the garden bench, and a hard-wearing topcoat for the shop bench that takes the spills. Seal every cut edge first, because the exposed plys drink the water at the edge before the face finish can help. The finish plan follows where the bench lives.
Run the primer or the sealant along the cut edges and the seat curve before the topcoats, so the plys stay closed under the weather. The edge is the panel’s weakest line outdoors, and the seal carries the life of the bench. Treat the edges as part of the finish, not an afterthought.
Build the topcoat in thin layers for a hard film that takes the tools, the cups, and the rain without lifting. Sand between the coats so the film bonds flat and the bench reads smooth. The bench that gets the full system lasts the seasons without the finish failing early.
Most bench builds fail in the same three places: a thin top on a long span, a frame assembled out of square, and raw edges left to the weather. Each mistake shows up as sag, wobble, or swelling in the first season. Set the span, the square, and the edge seal before the finish covers the work.
A long span on a single thin sheet reads as a spring and never sits flat under the tools. Laminate the top or add a centre rail so the span has support at the middle. The stiff top keeps the bench flat and the work accurate, and the clamps hold the work without the panel flexing under the pressure. A bench that holds flat holds the line of every cut made on it, so the top stiffness carries the accuracy of the whole shop.
A racked frame rocks on the floor and loosens the joints with every load. Re-square the frame, add the stretcher, and level the legs on the finished floor. The square frame carries the seat and the top without the movement that fails the joinery.
These are the questions builders ask most with a plywood bench.
18 mm suits a standard bench span, while a laminated two-sheet top carries the heavy workshop loads. Match the thickness to the span and the weight it takes.
Yes, a laminated plywood top stays flat and stiff under the tools, and the layering resists the twist that a solid slab takes. Seal the edges and finish the face for the shop spills.
With the right thickness, a framed base, and an exterior finish, a plywood seat carries two adults comfortably. The shaped seat and the sealed edges decide the outdoor life.
Assemble the frame square, fit the stretcher between the legs, and level the legs on the floor. A square frame with a stretcher keeps the bench still under load.
Exterior oil or varnish for the garden bench and a hard topcoat for the shop bench, after every cut edge is sealed. The edge seal carries the weather load.
Choose the thickness by the span, frame the base square, and seal every edge before the finish, and the bench reads flat for the seasons. The laminated top and the stretcher carry the weight that a thin sheet alone cannot. When the build needs a panel cut for the top and the seat, HYY supplies furniture-grade sheets with the thickness marked on the face, and the Commercial Plywood and Fancy Plywood pages show the panels for the bench and the shop build. The complete plywood product range backs the bench before the first load lands.