Our Location
5th Floor, Huake Center, Lanshan District, Linyi City, Shandong Province, China

5th Floor, Huake Center, Lanshan District, Linyi City, Shandong Province, China
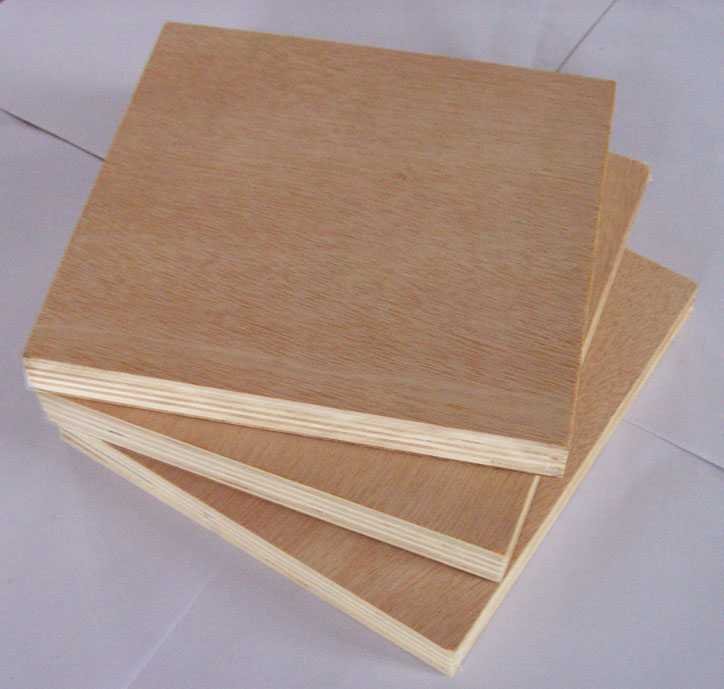
Start with one sheet of 18 mm plywood and stack the shelves, the sides, and the back into the plywood bookshelf that will outlast the flat-pack from the shop. Bookcases carry real weight, so the panel thickness and the shelf span decide whether the shelf sags under the hardcovers. This guide covers picking the plywood, planning the shelf layout, cutting the parts, and finishing a bookcase that holds its line loaded.
A bookshelf lives on its shelf stiffness, and the plywood thickness sets that stiffness before the brackets can help. An 18 mm panel spans a normal bookcase bay without visible sag, while a 12 mm sheet suits short, lightly loaded shelves. Set the thickness by the shelf span and the weight the shelf will carry.
The shelf span between the uprights drives the loading: an 18 mm shelf holds a comfortable 700 to 900 mm span at a normal book load. Thin 12 mm panels pair with short spans under a light set of books. The sags settle in the first months, so the spec starts with the span.
A good bookcase carries the visible face with the paint or the grain, while the structural plywood core does the bending work. A B-grade face with painted edges reads fine on a bookshelf, or an A face shows the wood under a clear finish. Name the face by the finish and the thickness by the span.
Draw the bookcase on the sheet before the saw: the two sides, the fixed shelves, the adjustable shelf list, and the back panel. Keep the adjustable shelves on shelf pins so the layout can move, and glue the fixed shelves into dados for the stiffness. The cut plan sets the parts to the sheet and the sheet to the plan.
Arrive at a full-sized drawing with the grain running the shelf length and the parts nested to use the sheet. The plywood grain runs the longest way of the sheet, so lay the shelves across the sheet length when the bay allows. Mark every part with the cut number before the saw starts.
Glue the fixed shelves into routed dados for the structure, and set the adjustable shelves on pins in the drilled shelf holes. The dado carries the load into the sides, while the pins let the reading stack change height. Plan the hole rows for the adjustable bays before assembly.
The bookshelf quality shows in the cut: a straight rip on the sides and shelves, and a clean edge that paint or edge banding will finish. Set the track saw or the circular saw guide to the line and cut the parts a hair oversize. Trim the panels to exact size after the primary cuts.
Cut a factory edge square with the track and then take the parts from the squared sheet, because the sheet corners are not always true out of the stack. Mark the reference edge and keep every dimension from the same square corner. The square start makes the case assemble without the racking wobble.
Cut the shelving bays on the horse at a constant width so the sides trap each shelf evenly. Score the face line with the blade at a low depth on the first pass to stop the face veneer chipping. A sharp blade and a straight edge turn the sheet into a case of tight joints.
Assemble the bookcase with the sides, the shelves, and the back on a flat bench, clamping the case square before the glue dries. Glue the dados, screw the back panel to plumb the case, and check the diagonals pull equal. A square case shows in the doors and the wall line when the bookcase stands.
Clamp the shelves into the dados and check the case diagonals so every corner measures the same. The back panel, glued or screwed to the rear edges, locks the case square and carries the racking load. Set the case on the floor and confirm the top reads flat before the finish goes on.
Drill the shelf-pin holes with a stop collar and install the metal pins before the back closes the bays. Count the pin pairs to the planned adjustable shelves so the heights stay flexible after assembly. The pins let the reading stack change without reworking the case.
Edge the visible panel sides and finish the surfaces, because the plywood edge band marks the difference between a flat-pack look and a custom build. Paint the case for a quiet wall colour, or seal the plywood faces with a clear coat to show the grain. The finish protects the panel edges and ties the bookcase to the room.
Cut edge banding a small amount long, iron or glue it on, and trim the overhang flush with a router bit. The banded edges hide the inner plys and read as solid timber corners. Band the front edges first and then the visible shelf ends.
Prime the panel faces and edges, sand between the coats, and finish with the topcoat in the room colour. A clear coat suits a bookcase that shows the wood grain, with the banded edges matching the face. Both finishes seal the plywood edges against the room moisture and the knocks of the daily use.
Most plywood bookshelf failures come from three avoidable errors: a thin shelf on a long span, a racked case assembled out of square, and an unsealed panel edge taking moisture. A sagging shelf over a long bay and a wobbling case both lead back to the layout plan. Fix the span, the square, and the edge seal in the build schedule.
Lengthen the bay’s support with a thicker shelf, a centre divider, or a stiffening batten glued under the front edge. A sagging long shelf reads in the first hardcover rows and grows with the load. Plan the span to the reading stack and the shelf stays flat for decades.
Clamp the case square, fix the back panel, and set the bookcase level on the finished floor so the racking never starts. A wobbling case puts every joint in shear and loosens the glues over the years. The square case holds the shelves and the finish without a creak.
These are the questions buyers ask most with a plywood bookshelf.
18 mm plywood suits a standard bookcase with comfortable bays, while 12 mm works for short, lightly loaded shelves. Match the thickness to the shelf span and the load.
Yes, one 2440 by 1220 mm sheet cuts the sides, shelves, and the back for a single bookcase. Layout the parts on the sheet before the saw.
The back locks the case square and stops the racking, so fit the back panel unless the design is a deliberate open frame. It adds rigidity for very little weight.
An 18 mm shelf holds roughly a 700 to 900 mm span at a normal book load. Longer spans need a thicker shelf, a divider, or a stiffening batten.
Edge band the visible panel ends and finish the face with paint or a clear coat. The edge seal is part of the build, not an optional extra.
Set the thickness by the span, plan the sheet, cut to the square, and assemble the case on the bench before the finish. The reading stack loads the shelf and the joints hold the weight across the years. When the build needs panels with the right thickness and a clean face, HYY supplies furniture-grade sheets cut to the plan, and the Fancy Plywood and Melamine Plywood pages show the faces for the finished bookcase. The complete plywood product range backs the shelf before the books arrive.