Our Location
5th Floor, Huake Center, Lanshan District, Linyi City, Shandong Province, China

5th Floor, Huake Center, Lanshan District, Linyi City, Shandong Province, China
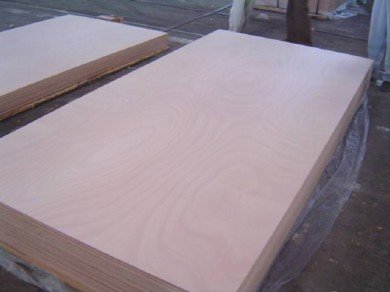
Trade a cabin wall for the lake and the material stays the same: a plywood boat hull bends the same flat sheet into a watertight shell that thousands of builders have launched. The panel that sails needs a fully waterproof bond and a void-free core, because a boat lives with water on every side. This guide covers how to choose the plywood for a boat build, the construction methods, and the sealing that keeps the hull tight for the season.
A boat takes a plywood grade made for continuous wet service, with a fully exterior bond and a core built without voids that water would lick into. Marine grade leads the list, with void-free veneers and a waterproof glue line tested for the boat builder. Buyers who cannot source marine grade step down to a genuine exterior structural panel with a stamped bond and sealed edges.
Marine plywood carries a void-free core and a waterproof bond with strict face limits for the close inspection of a hull. Exterior structural plywood holds the same waterproof bond but may allow minor core voids, which the builder fills and seals during the layup. The marine panel earns its higher price on the critical hulls that see deep service.
The hull thickness follows the boat size and the framing, with thin panels for the small dinghies and thicker panels for the larger hulls. A 6 to 12 mm sheet bends around the chines and takes the stitch-and-glue hulls, while heavier panels carry the bigger build. The plans state the thickness for each panel on the boat.
Two construction methods dominate the plywood boat world. Stitch-and-glue wires the panels edge to edge with copper stitches and filleting, turning a flat sheet into a hard-chined hull in a skip of epoxy. Cold molding glues thin veneer strips over a form to build a soft, curved shell. Each method plans the same plywood discipline: a clean cut and a fully sealed seam.
Cut the panels to the plan, drill the holes along the seam, and stitch the edges together with wire to pull the hull into shape. Fill the seam and the joint with thickened epoxy so the wire hole becomes part of the waterproof fillet. The method suits the first-time builder because the assembly happens dry before a drop of glue.
Cold molding lays thin veneer strips diagonally over the building frame, gluing each layer with epoxy and letting the shell form the curves. The cross-laid strips build a strong, lightweight skin that a full plywood panel cannot shape. The skill sits in the layup, filler, and the even pressure of every bonded layer.
A boat hull lives on its cut lines, so the panels need a full-sized plan, a sharp blade, and a clean edge before the epoxy sees the joint. Draw the panels from the lofted plan, cut to the line with a fine-tooth blade, and shape the curves with the sander. A clean, square edge lets the stitches and the fillets close the hull tight.
Transfer the hull panels from the full plan, cut slightly outside the line with the jigsaw and a fine blade, then sand the edge to the exact curve. The edge fit decides every seam the epoxy must seal, so the tight line pays the whole hull. Sand the edge fair before the stitching starts.
Number each panel and dry-fit them against the frame before the wire goes in, so the hull lines close before any glue commits. A dry fit catches the twist and the gap that glue would hide and regret. Test fit, trim, then assemble the hull once it reads correct.
The plywood that floats carries its protection in the layup: epoxy coats the face, seals the edges, and fills the seams until the hull reads as one skin. A raw plywood edge soaks water through the exposed core, so every cut and joint gets a multiple-coat epoxy seal. The seal turns the wood shell into the barrier the boat needs.
Coat the cut edges and the seams with epoxy before assembly and again in the fillet, so the core never meets the wet. The edge seal is the hull’s main defence, because wicking happens at the cut lines first. Build the seal into the schedule, not as a repair at the end.
Many hulls glass the exterior with woven or biaxial cloth in epoxy, stiffening the plywood and locking the water out. The glass layer bonds the panel seams together and adds the abrasion the hull meets ashore. A glassed hull shrugs off the dock and the launch ramp far longer than a bare plywood shell.
The hull gets its strength from the joints: fillets of thickened epoxy sweep every corner, frames tie the panels to the bulkheads, and the deck closes the structure. Interior frames spaced on the plan carry the hull in shape while the epoxy cures. The fillet links the flat panels into the rigid shell the boat needs.
A thickened epoxy fillet smooths the angle where two panels meet and spreads the working load across both faces. The concave fillet forms a channel that the glass can lay into without air pockets. Fillets turn the seams from a glued edge into a structural joint.
Internal frames and bulkheads, cut from the same waterproof plywood, stiffen the hull and divide the interior into the boat’s cells. The structure transfers the loads between the shell and the deck so the hull holds its line under way. Build the frames into the schedule so the hull cures as a complete unit.
A plywood boat repays the care between seasons: inspect the bilge, touch up the paint, and keep the water out of the seams. Paint the hull with the topcoats the plans specify and maintain the brightwork on the face panels. The hull that stays dry inside and sealed outside floats for the years of service.
Check the seams, the fasteners, and the stem for hairline cracks before the season starts, and touch up the paint so the water never meets the raw wood. A small leak fixed early stays a one-day job, while a missed seam turns into a re-glassing project. Keep the inspection on the schedule with the rigging.
Store the boat dry under cover so the hull drains and the edges dry out between seasons. A hull that stays waterlogged under wet covers grows the rot that the epoxy never sees. Vent the cover and brace the hull against the frost, and the plywood floats again in the spring.
These are the questions builders ask most with a plywood boat.
Marine plywood leads with a void-free core and a waterproof bond for the hull. A genuine exterior structural panel with the same bond works as a budget alternative when the edges stay sealed.
Interior plywood fails in a boat because the glue wicks water and the core voids soak. Use a fully waterproof bonded panel and seal every edge with epoxy.
The plan sets the hull thickness, commonly 6 to 12 mm for small stitch-and-glue hulls and heavier for larger boats. Match every panel to the thickness the plans call out.
Yes, epoxy seals the edges, bonds the seams, and closes the hull over the plywood. The layup is what makes a plywood boat watertight.
Stitch-and-glue construction suits the first-time builder because the hull assembles dry before gluing. Follow the plans, and the panels bring the hull together.
Choose the waterproof panel, follow the plan’s thickness, seal every edge, and glass the exterior before the first launch. The build keeps the water out at every seam. When the project needs panels ready for the water, HYY supplies exterior and structural panels with the bond marked on the face, and the Film Faced Plywood and Commercial Plywood pages show the working panels for the build. The complete plywood product range backs the hull before the launch.