Our Location
5th Floor, Huake Center, Lanshan District, Linyi City, Shandong Province, China

5th Floor, Huake Center, Lanshan District, Linyi City, Shandong Province, China
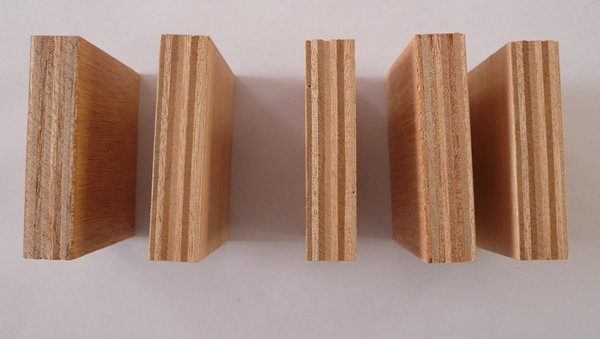
The face of the sheet carries the pattern that reads across the room, and plywood texture follows the veneer cut, the species, and the grade stamped on the panel. A rotary cut rolls the broad cathedral figure while the sliced cut lays the straight lines, and the face grade sets how much of the natural character shows through the finish. This guide covers the cuts, the grades, and the matching that keeps the texture working in the room.
The texture comes from the way the log is cut into the veneer and from the species that the veneer comes from, because the grain pattern and the pore structure both ride through the press into the face. The cut sets the figure and the species sets the tone. Read the face and the cut shows.
The rotary cut peels the log in the continuous roll that makes the broad cathedral figure across the sheet, while the sliced cut lays the straight, even lines that the furniture face prefers. The cut decides whether the pattern reads bold or quiet. Match the cut to the design.
The birch face reads fine and even under the clear coat, while the oak shows the open pore that the grain filler levels and the pine carries the knots that the rustic work keeps. The species sets the tone and the texture together, and the open or the closed pore decides how much filling the finish needs. Read the species before the finish is chosen so the preparation matches the face.
The grade on the sheet sets how much natural character the face carries, because the veneer is sorted for the clean panel or the working panel before the press. A clean grade keeps the face uniform for the painted work, while the natural grade lets the knots and the mineral streak show. The grade matches the room.
The clear, uniform face suits the painted cabinet and the smooth panel where the pattern should not read through the film, because the patch and the grain of a lower grade telegraph under the topcoat. The clean face keeps the paint even. Choose it where the finish hides the grain.
The natural face carries the knots, the mineral streak, and the cathedral figure that the clear oil shows as the design of the panel, and the rustic work reads that character as the point rather than the defect. The clear finish turns the texture into the feature. Take it where the grain shows.
The panels read as one surface only when the grain runs the same way and the figure matches at the seam, because a flipped sheet changes the light that the face returns. Plan the sequence before the sheets are cut and keep the roll direction together. The matched face reads as the built-in rather than the patchwork.
Keep the grain running the same direction across the joined panels, because the crossed grain catches the light differently at the seam and reads as two surfaces. Set the sheets in the order they came off the roll. The matched direction closes the joint.
The bookmatched pair opens the veneer leaves in the mirror pattern that centres the figure on the cabinet face, and the matched sheet turns the natural grain into the composed design. The mirror needs the sequential leaves from the same log. Plan the bookmatch before the cut.
The finish either shows the texture or levels it, depending on the film that goes on the face, because the clear coat reads the grain while the filler and the primer can flatten it. Decide whether the texture serves the room before the sanding starts. The finish plan follows the texture choice.
The clear oil or lacquer wets the veneer and deepens the figure that the dry face shows lightly, so the cathedral and the pore read as the surface of the panel. Sand to the fine grit first so the clear coat shows the grain rather than the scratch. Let the finish bring the texture forward.
The grain filler and the primer close the open pore and the figure that the painted face would otherwise show, so the topcoat reads as the even film rather than the grain underneath. Fill, sand, and prime before the paint goes on. The leveled face takes the clean color.
The texture fails in a few familiar places: the mismatched grain at the seam, the natural face sent to the painted work, and the clear coat over the unsanded scratch. Each mistake goes back to the face choice rather than the finish. Match, sand, and read the grade first.
A flipped sheet at the seam breaks the pattern into two surfaces, so plan the sequence and keep the roll direction together before the panels are cut. The matched grain closes the joint. Check the face against the neighbouring panel before the fixing.
The knot and the patch that show through the paint come from the natural face sent to the clean work, so fill and prime the panel or step the sheet to the clean grade. The right face stops the telegraph. Read the grade before the paint is opened.
The room reads its texture: the quiet cabinet takes the even face under the paint, the feature wall takes the matched grain under the clear coat, and the rustic work takes the knots as the point. Match the face to the light and the finish, because the window wall reads the grain while the dim corner hides it. The right texture carries the design and the room reads the panel for the years.
The headboard, the island panel, and the feature wall take the matched grain under the clear finish because the texture is the surface that the eye reads first. Bookmatch the pair and let the figure centre the design. Take the natural face where the panel shows.
The painted cabinet and the smooth lining take the clean face and the leveled texture because the room needs the even plane rather than the pattern. Fill, prime, and keep the grain under the film. Choose the quiet face where the color leads.
These are the questions buyers ask most when they read the face of the panel.
The veneer cut and the species set the pattern, because the rotary roll makes the broad figure and the sliced cut lays the straight lines. The grain carries through the press into the face.
The veneer comes from different logs and different positions in the log, so the figure and the tone shift between the sheets. Plan the sequence and keep the matched faces together.
Yes, with the grain filler and the primer that close the open pore and the figure before the topcoat, so the paint reads as the even film. Sand to the fine grit first.
Sand through the grits and let the clear oil or lacquer wet the face so the figure reads as the surface, or fill and prime it for the smooth painted work. Match the finish to the texture you want.
The open grain and the knot can telegraph through the thin film, so fill and prime the face before the topcoat. The leveled face keeps the color even.
Read the cut, the species, and the grade against the room, and the plywood texture becomes the surface the design depends on rather than the surprise that arrives with the sheets. The matched face and the right finish carry the panel. When the project needs a face selected for the grain, HYY supplies decorative sheets with the veneer and grade marked on every panel, and the Fancy Plywood and Melamine Plywood pages show the faces for the feature and the quiet work. The complete plywood product range backs the choice before the sheets are cut.