Our Location
5th Floor, Huake Center, Lanshan District, Linyi City, Shandong Province, China

5th Floor, Huake Center, Lanshan District, Linyi City, Shandong Province, China
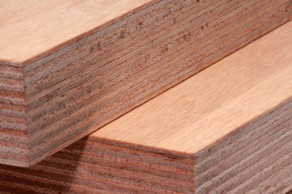
The panel leaves the saw with the raw face and the open edges, and the question of plywood how to finish separates the raw sheet from the surface that carries the room. The finish system runs sanding, edge sealing, and the topcoats in the right order, because each step covers what the one before left open. This guide covers the sanding sequence, the edge seal, and the oil, varnish, and lacquer choices that protect the plywood face for the years.
The finish holds on the sanded face, so the sanding sequence levels the veneer and opens the grain for the sealant without the scratch that the topcoat shows. Work through the grits from the coarse level to the fine polish, and sand along the grain to keep the face clean. The sanded panel is the base that every coat builds on.
Start with the coarse grit that levels the mill marks and the handling dents, then step through the medium to the fine grit that polishes the face for the sealant. Each grit removes the scratch of the one before, and the final pass runs with the grain. Sand between every coat with the fine grit for the bond.
Sand the cut edges square and smooth before the seal, because the rough edge drinks the first coat and telegraphs the ply lines through the finish. The sanded edge takes the sealant evenly and reads clean under the topcoat. Treat the edge as part of the face preparation.
The open plys at the cut edge drink the moisture and the finish first, so the edge seal carries the protection that keeps the panel stable. Seal every edge and the back face where the room humidity reaches the core, and let the sealant cure before the topcoat. The sealed panel moves less and holds the finish longer.
The cut edge exposes the ends of every veneer layer, and those ends soak the oil or the primer like the end grain of the solid timber. An unsealed edge swells under the room moisture and lifts the finish along the line. Seal the edge before the face and the panel stays true.
Seal the back face and the hidden edges where the room humidity reaches the core, because an unsealed back lets the moisture enter from behind and cup the panel. The balanced seal keeps the sheet flat through the seasons. Treat both faces as part of the system.
The topcoat choice follows the room and the wear: the oil brings out the grain with the natural feel, the varnish builds the hard film that takes the spills, and the lacquer dries fast for the production finish. Each system suits the use the plywood face meets. Read the exposure and the wear before the tin is opened.
The oil finish soaks the veneer and brings out the grain with the matte, natural feel that suits the furniture and the clear-finished panels. Build the oil in thin coats, wipe the excess, and let each coat cure before the next. The oiled face repairs easily and ages with the room.
The varnish builds the hard film that takes the water rings and the daily wear on the table top, while the lacquer dries fast and levels clean for the production schedule. Both systems need the sealed edge and the sanded face underneath. Build the film in thin coats with the sanding between.
The even coat comes from the right applicator, the thin layer, and the wet edge that keeps the lap marks off the face. Work along the grain, keep the coat thin, and maintain the wet edge across the panel so the finish levels without the ridges. The even film is the whole appearance of the finished face.
Work across the panel while the leading edge stays wet, because a dried lap line shows through every coat after it. Overlap each pass into the wet edge and keep the applicator loaded evenly. The wet edge turns the separate passes into one continuous film.
Build the finish in thin coats with the light sanding between each one, because the thin film cures hard while the thick coat stays soft and tacky. Let each coat cure to the tin’s window before the next goes on. The cured film carries the wear that the fresh coat cannot.
The plywood finish fails in a few familiar places: the unsealed edge that swells under the moisture, the heavy coat that stays tacky, and the coarse scratch that telegraphs through the topcoat. Each mistake goes back to the preparation rather than the product. Seal, sand, and thin-coat the system.
An unsealed edge under the room moisture swells the plys and lifts the finish along the line, so the sealed edge carries the protection. Strip the lifted finish, seal the edge, and rebuild the coat. The sealed edge stops the swelling at the source.
A heavy coat stays soft and dusty because the film cures from the surface down, so the thin coats with the sanding between cure hard and clear. Strip the soft film and rebuild it thin. The cured film takes the wear that the thick coat cannot.
The finished plywood repays the light care between the seasons: wipe the face, touch up the scratches, and renew the oil or the topcoat where the wear lands. The maintained finish keeps the panel stable and the face clean for the years of service, and the light care costs the afternoon rather than the refinish. The care plan is part of the finish system.
Light scratches on the oiled face take the spot oil and the fine sanding, while the film finish takes the scuff sand and the local recoat. Repair the damage the day it appears rather than waiting for the full refinish. The early touch-up keeps the finish intact.
Wipe the finished face with the cleaner the tin specifies and check the edges for the lifted finish before the damp season. The maintained seal keeps the moisture out of the core. The light care carries the panel far beyond the first finish.
These are the questions builders ask most when they learn how to finish plywood.
Sand through the grits, seal every cut edge and the back face, then build the oil or the varnish in thin coats with the sanding between. The sealed edge and the thin film carry the finish.
Yes, the cut edges drink the finish and the moisture first, so the edge seal keeps the panel stable and the face even. Seal the edges and the back face before the topcoat.
Varnish holds on the sanded and sealed panel, because the raw face drinks the first coat and leaves the patchy film. Sand, seal, and then build the varnish in thin coats.
Oil brings out the grain with the natural feel and repairs easily, while varnish builds the hard film that takes the spills and the wear. Choose by the room and the use the face meets.
Build the finish in thin coats until the face reads even and protected, with the light sanding between each cured coat. The thin film cures hard while the thick coat stays soft.
Sand the face, seal the edges, and build the thin coats, and the plywood finish protects the panel and shows the grain for the years. The sealed edge and the cured film are the whole system. When the project needs a panel with a clean face for the finish, HYY supplies furniture-grade sheets with the face and thickness marked, and the Fancy Plywood and Commercial Plywood pages show the faces that take the oil and the varnish. The complete plywood product range backs the finish before the first coat is opened.